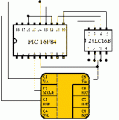
This Phoneix programmer is based on the version previous released by Odin.
Joos Design have added a better power supply and made some other small changes.
We presume a Phoenix programmer will not be your first build, so a detailed instruction is not supplied.
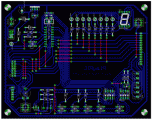
The PCB drawing shuld be downscaled to about 12 % of the original,
make a test printout and verify you have the right distance for the IC legs.
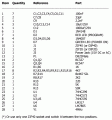
PART LIST FOR PHOENIX PROGRAMMER
Reference to Component.bmp
POS NO SPEC. RS PART NO.
________________________________________________
1 Main board
2 Smart Card Connector 197-1197
3 9 Way D connector - socket 446-585
4 Fastening Screws
5 DC Power Connector 486-662
6 Heat Sink - only needed for heavily use L=19mm W=13mm
7 5V Regulator 853-371
8 Fastening Screw
9 Bridge Rectifier 657-088
10 Resistor 20K ohm 163-763
11 Resistor 220 ohm 149-650
12 Resistor 220 ohm 149-650
13 Resistor 220 ohm 149-650
14 Resistor 2K2 ohm 149-739
15 Resistor 1M ohm 149-975
16 Not used
17 Crystal 3.579 MHz 226-1500
18 Capacitor 1 uF 200-6167
19 Capacitor 0.1 uF 115-988
20 Capacitor 0.33 uF 116-032
21 Capacitor 100 pF 128-168
22 Capacitor 27 pF 128-763
23 Capacitor 27 pF 128-763
24 Capacitor 33 uF - only needed for heavy use 116-880
25 LED green 590-345
26 LED red 590-339
27 IC 7407N 306-336
27b IC socket 14 pin 447-314
28 IC MAX232ECPE 225-8510
28b IC socket 16 pin 447-320
29 IC 74HC04N 217-5550
29b IC socket 14 pin 447-314
30 Secondary board, on top of smartcard connector.
Mount everything but the secondary board, leds and ICs
Mount top of leds into the secondary board, fasten secondary board to top of smartcard connector
after carefully first having put the led legs through the holes in main board.
Finally , ground yourselves to get rid of any statics and mount the ICs.
Author:
Email:
Website: http://www.electronics-lab.com

 Audio
Audio


